One of the major improvement in Magento 2 is the introduction of CLI commands based on Symfony Console Component.
CLI commands can perform multiple tasks. Some of them are:
- Installing Magento (and related tasks such as creating or updating the database schema, creating the deployment configuration, and so on)
- Clearing the cache
- Managing indexes, including reindexing
- Creating translation dictionaries and translation packages
- Generating non-existent classes such as factories and interceptors for plug-ins, generating the dependency injection configuration for the object manager.
- Deploying static view files
- Creating CSS from LESS
- Providing “plugin” capability for third-party developers
To invoke the CLI command:
php /path/to/your/magento2/bin/magento group:[subject:]actionTo list all the available console commands:
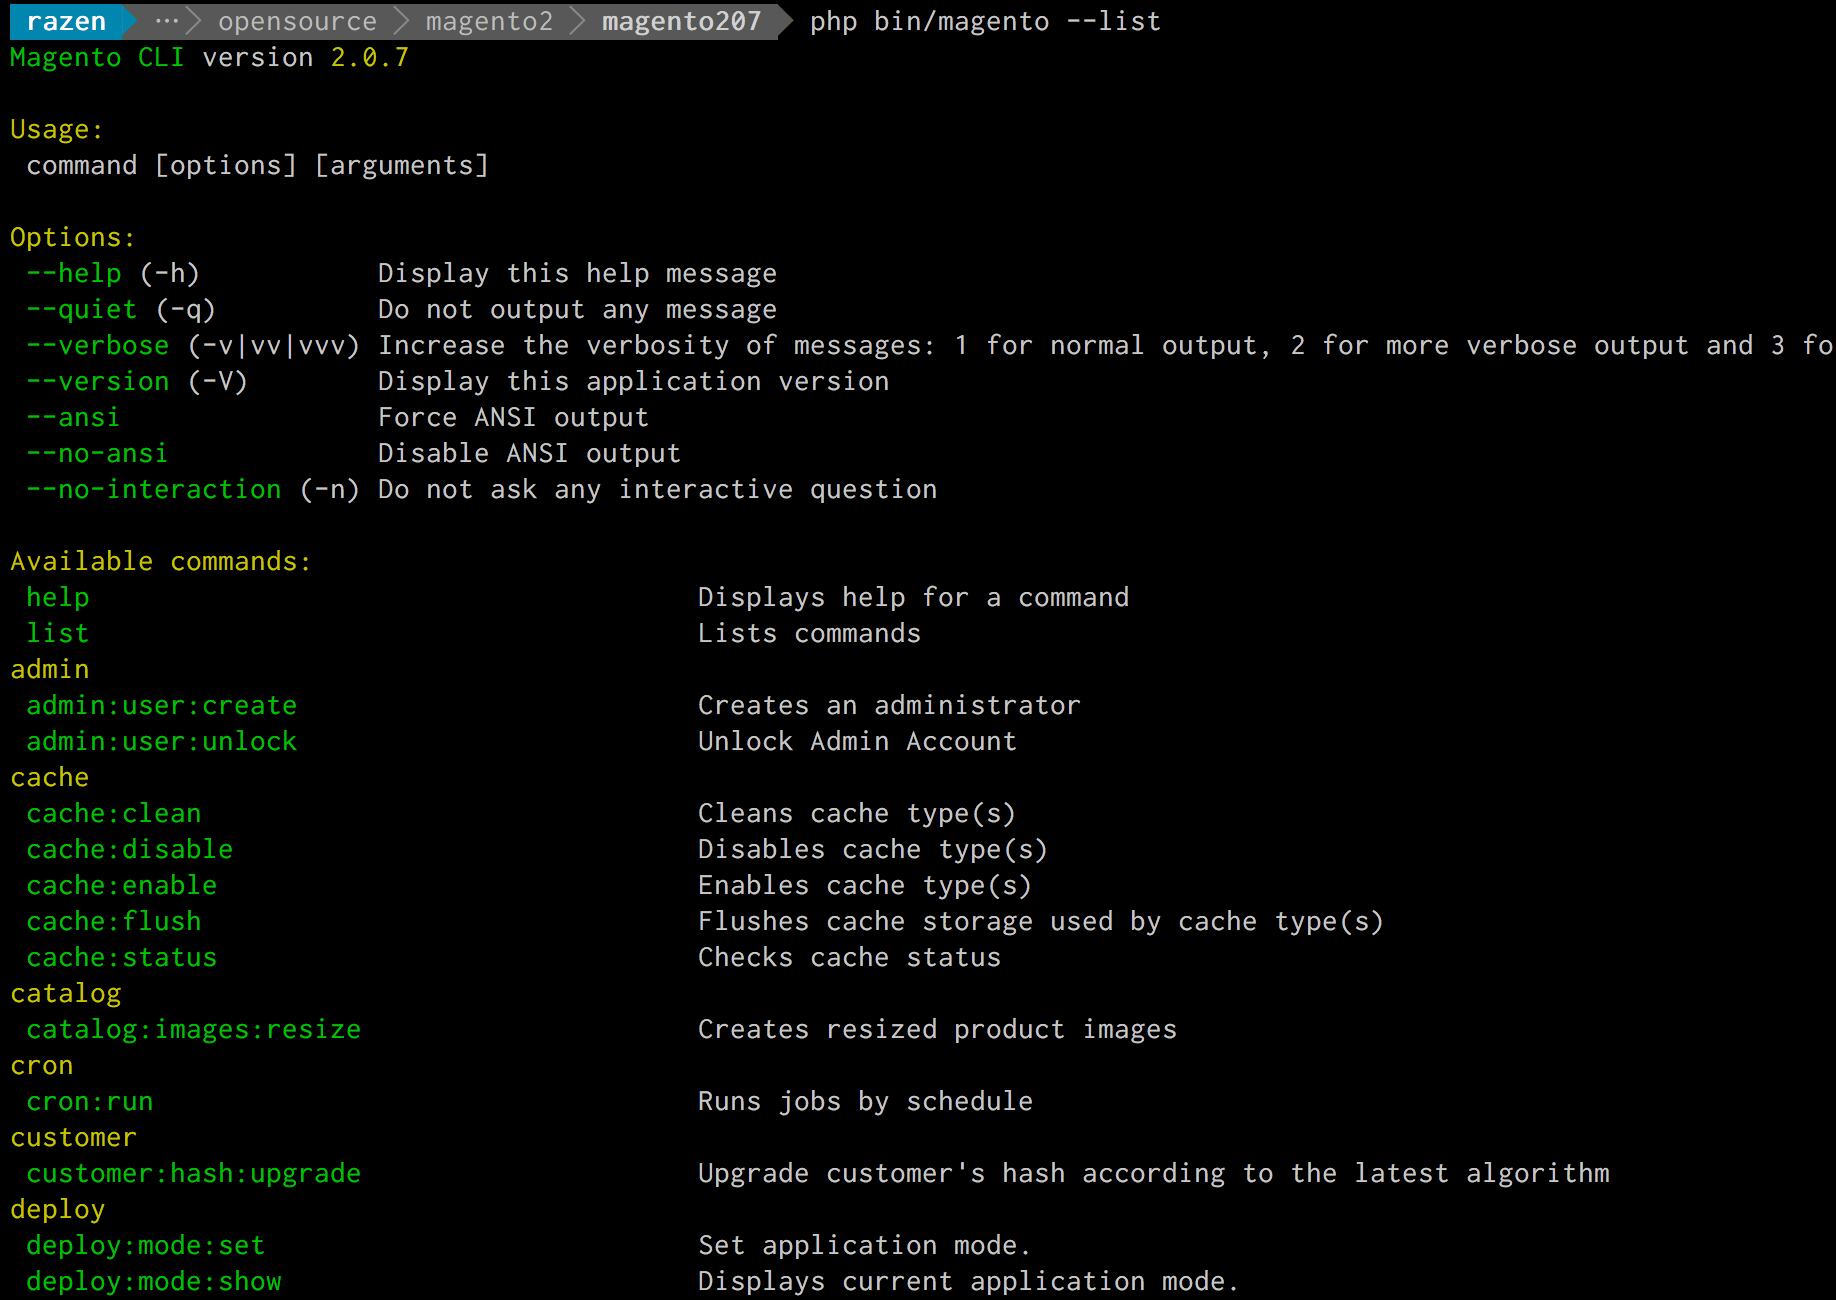
php /path/to/your/magento2/bin/magento --listwhich will output similar to:
In this article, we will discuss how to configure bash shell for Magento 2 CLI to increase your productivity.
Bash Configuration Tips for Magento 2 Console
1. Install Bash Completion
Refer to our previous article – Install Bash Completion for Mac OS-X, which shows how to enable the completion feature for shell commands just by pressing [TAB]
2. Create useful bash aliases
Alias for bin/magento: mage2
Edit your ~/.bash_profile and add the following code:
alias mage2 = "./bin/magento"Now instead of using:
php bin/magento [options]You can simply use:
mage2 [options](Command must be run from the root of Magento2 path)
Alias for enabling the module: mage2-module-enable
In order to enable the module in Magento2, you have to run following series of command:
php bin/magento module:enable Vendor1_Module1 VendorN_ModuleN --clear-static-content
php bin/magento setup:upgrade
To simplify this process, you can simply add the alias as:
mage2ModuleEnable() {
	mage2 module:enable "$@" --clear-static-content && mage2 setup:upgrade
}
alias mage2-module-enable="mage2ModuleEnable"
Now you can simply enable the module(s) by running:
mage2-module-enable Vendor1_Module1 Vendor2_Module2These are just a few examples. You can add similarly if needed.
Isn’t that a smarter way of executing CLI command?
Note: Don’t forget to reload the bash after adding aliases:
source ~/.bash_profile3. Install Magento2 Bash Completion
Some of the cool dudes in the Magento community are really doing amazing work. One of such work is magento2-bash-completion plugin.
In order to install this magento2-bash-completion, proceed as follow.
Download plugin to bash-completion hook folder
curl -o /usr/local/etc/bash_completion.d/magento2-bash-completion https://raw.githubusercontent.com/yvoronoy/magento2-bash-completion/master/magento2-bash-completionReload the shell
source /usr/local/etc/bash_completion.d/magento2-bash-completionTime for Magic
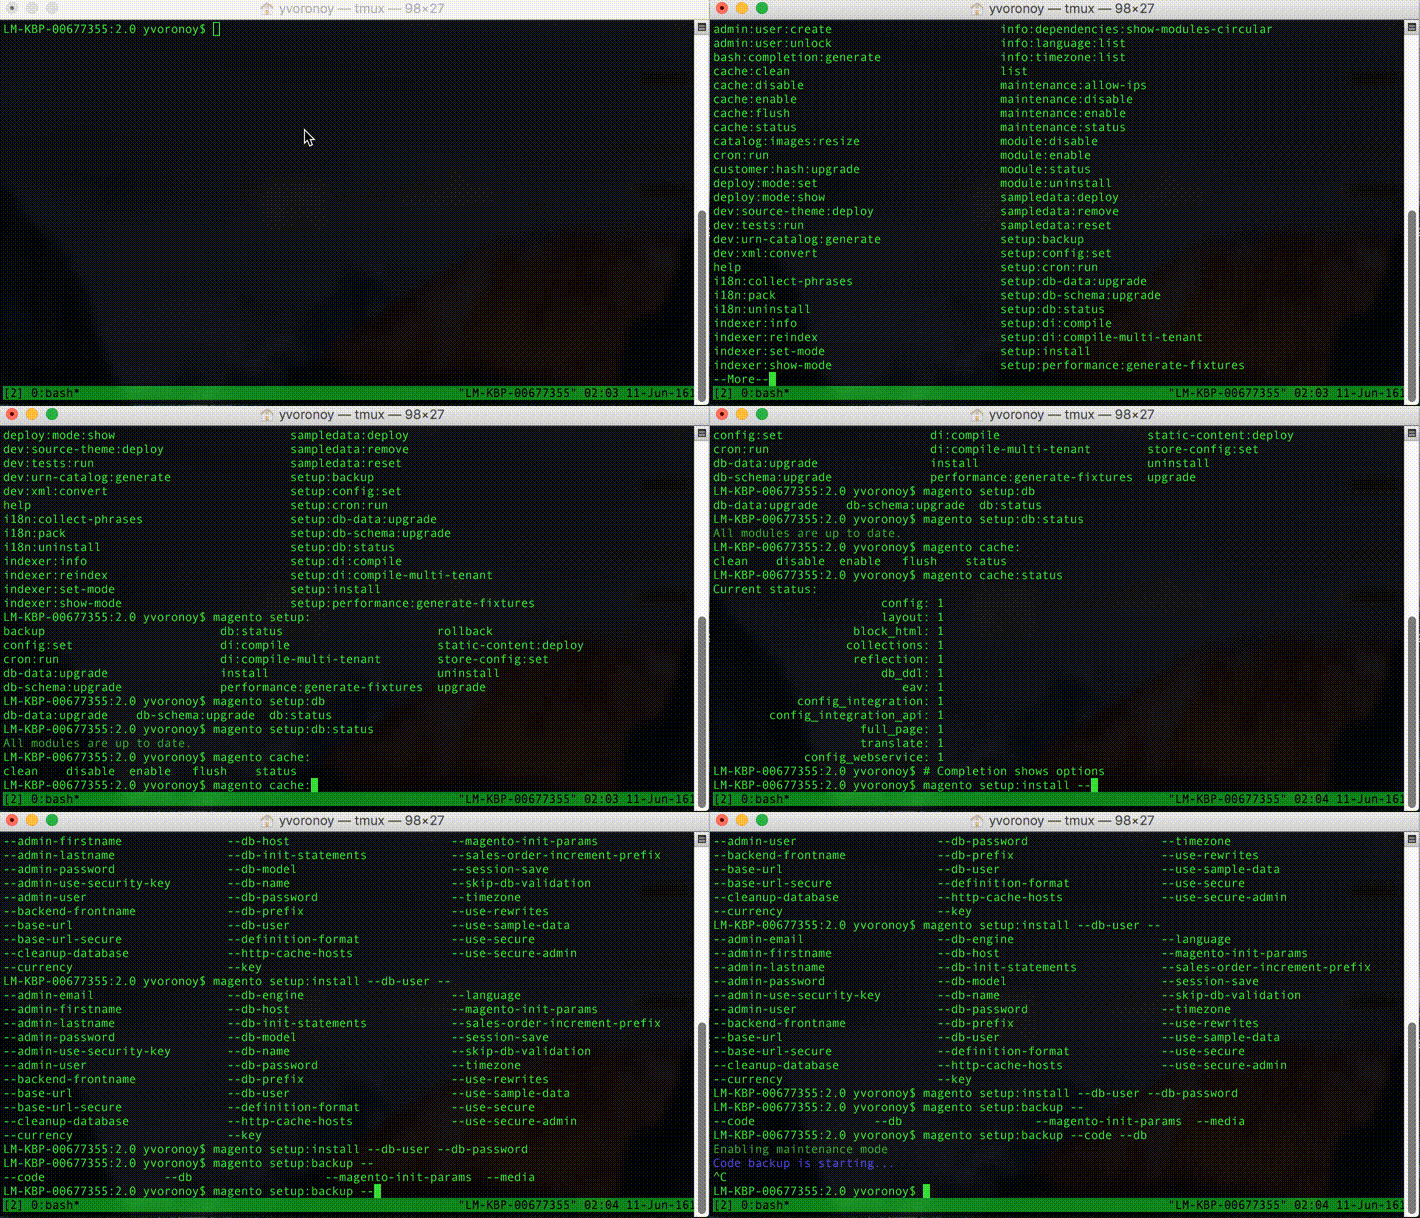
Just write a few characters of command and press [TAB], you will see as per the following gif:
(Image Source: https://github.com/yvoronoy/magento2-bash-completion)
We will keep on updating this post with more cool bash tips for Magento 2 CLI, so keep your eye on it.
Do you have any useful tips on executing Magento2 CLI commands? Please do share in the comment.

