
The performance of a website is always the key factor for the higher conversion rate. Fortunately, Magento 2 (both CE & EE) comes by default with the support for FPC (Full Page Caching), Varnish & Redis to make your store fly.
In this tutorial we will be discussing brief info about Varnish, it’s installation and configuration so bear with me.

Magento 2 supports Varnish versions 3.0.5 or later or any Varnish 4.x version.
And Magento team strongly recommends using Varnish in production as the built-in full-page caching (to either the file system or database) is much slower than Varnish, and Varnish is designed to accelerate HTTP traffic.

Varnish Cache is an open source web application accelerator (also referred to as an HTTP accelerator or caching HTTP reverse proxy). Varnish stores (or caches) files or fragments of files in memory; this enables Varnish to reduce the response time and network bandwidth consumption on future, equivalent requests. Unlike web servers like Apache and Nginx, Varnish was designed for use exclusively with the HTTP protocol.
Assumption
We have carried out the Varnish installation in the following environment:
- Ubuntu – 14.04 LTS
- Nginx – 1.9.6
- MySQL – 5.6.28
- PHP – 5.6.20 (but PHP 7 is recommended)
- Magento EE – 2.0.5
Installation
Run the following series of command as a root user (sudo su).
apt-get install apt-transport-https
curl https://repo.varnish-cache.org/GPG-key.txt | apt-key add -
echo "deb https://repo.varnish-cache.org/ubuntu/ trusty varnish-4.1" \
     >> /etc/apt/sources.list.d/varnish-cache.list
apt-get update
apt-get install varnish
If everything goes right you should be able to see the Varnish version with:
varnishd -VConfiguration
Once Varnish is installed, you need to configure it and your web server(Nginx in our case).
Configure your Web Server(Nginx)
Configure your web server to listen on a port (say: 8080) other than the default port 80 because Varnish responds directly to incoming HTTP requests, not the web server.
For this add the ‘listen’ directive in ‘server’ block as:
server {
    listen 8080 default_server;
    server_name  your-mage2-store.dev;
    ...
}
to default nginx configuration file (generally located at /path/to/nginx/sites-enabled/default)
Configure Varnish Configuration
1. Modify Varnish System Configuration
vim /etc/default/varnishAnd edit the file to have a similar code:
START=yes

# Maximum number of open files (for ulimit -n)
NFILES=131072

# Maximum locked memory size (for ulimit -l)
# Used for locking the shared memory log in memory.  If you increase log size,
# you need to increase this number as well
MEMLOCK=82000

DAEMON_OPTS="-a :80 \
             -T localhost:6082 \
             -p http_resp_hdr_len=64000 \
             -f /etc/varnish/default.vcl \
             -S /etc/varnish/secret \
             -s malloc,256m"
2. Modify default.vcl
Make a backup of default one.
cp /etc/varnish/default.vcl /etc/varnish/default.vcl.bak
vim /etc/varnish/default.vcl
And edit the lines under ‘backend default’:
# Default backend definition. Set this to point to your content server.
backend default {
.host = "127.0.0.1";
.port = "8080";
}
Where
- .host – fully qualified hostname or IP address and listen port of the Varnish backend or origin server; that is, the server providing the content Varnish will accelerate. Typically, this is your web server.
- .port – the web server’s listen port (8080 in this example)
Note: This is the minimal configuration. You need to use the configuration which you get from Magento 2’s Varnish Export (Ref – #3).
3. Configure Magento to use Varnish
Instead of manually editing default.vcl, Magneto 2 comes up with an export option for it.
First, enable the Full Page Cache to use Varnish (Go to Admin > Stores > Configuration > Advanced > System > Full Page Cache), you will see as:
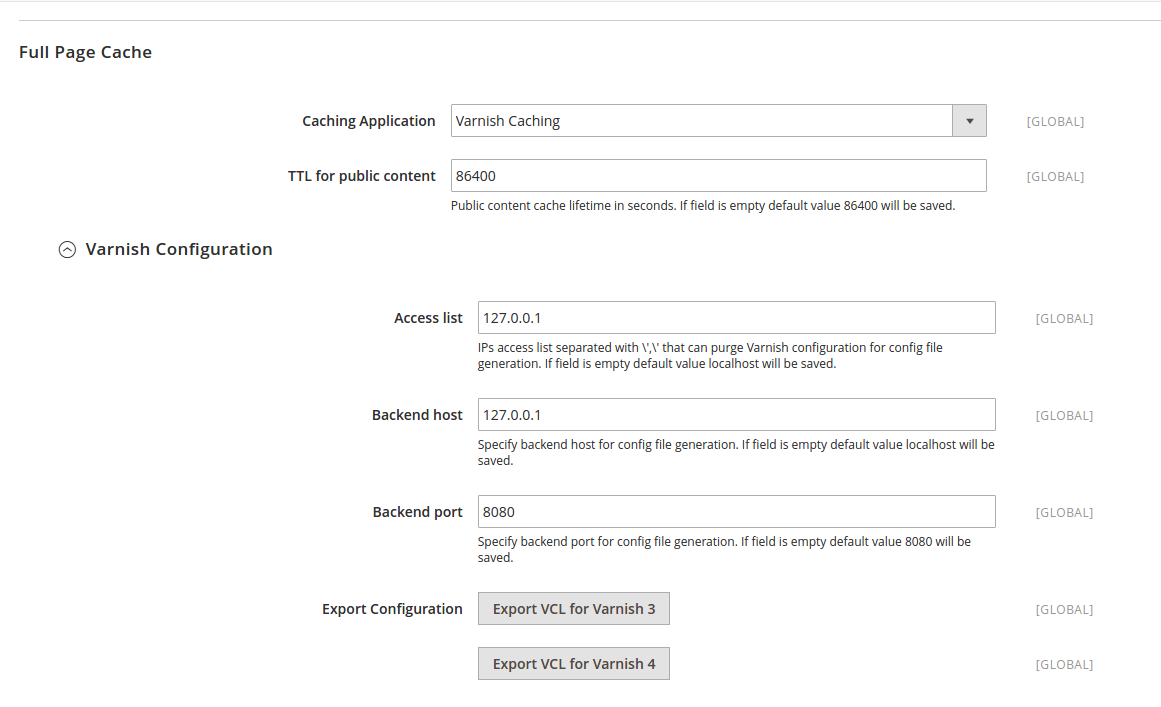
Save the settings and hit the Export VCL button (Varnish 3 or 4 as per your Varnish Version).
And use this default.vcl to replace the file in /etc/varnish/default.vcl
Finally, restart the Varnish & Nginx
service nginx restart
service varnish restart
Verification
I assume You have followed all the above steps (Installation & Configuration). Now let’s check if Varnish cache server is taking into account for HTTP response or not.
Check if Varnish is listening to port 80
Run the following command:
netstat -tulpn | grep varnishd
Verify contents in var/cache, var/page_cache folder is not regenerated
Since FPC is configured to serve the content from Varnish, once cleared, cache folders (var/cache, var/page_cache) should always be empty.
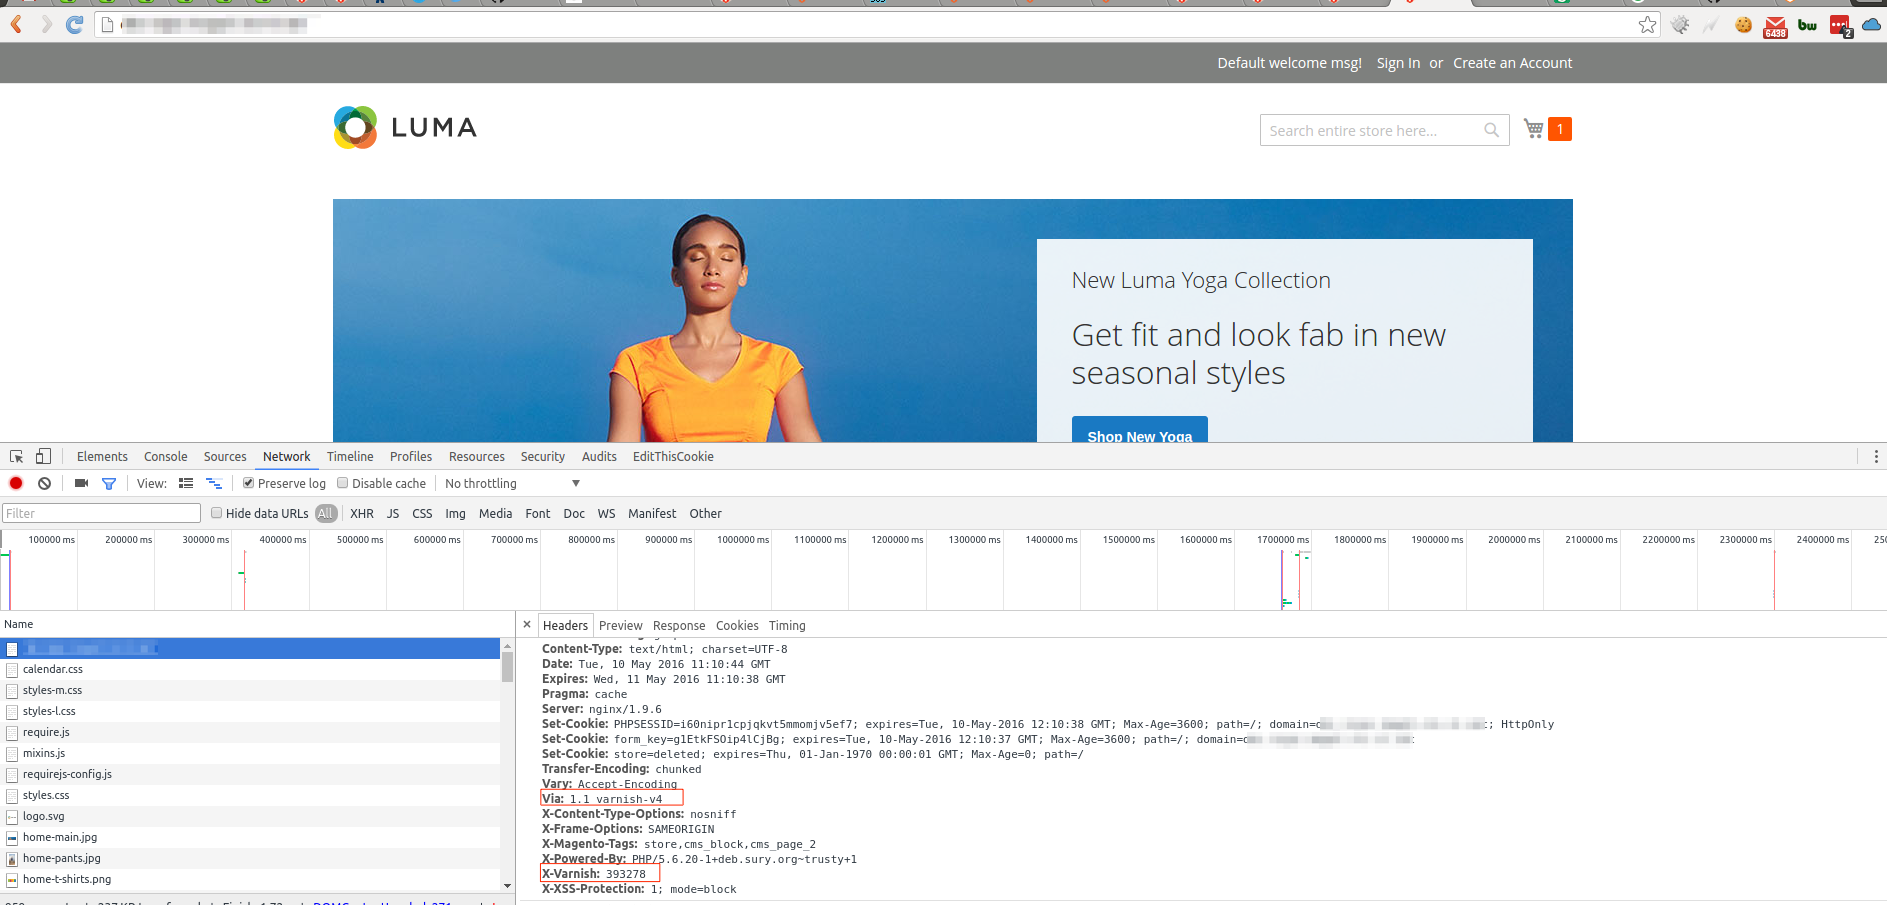
Verify the HTTP response headers
Load your Magento 2 Frontend and check the response from the browser console, you will see similar as shown in the below screenshot:
Or you can simply use CLI as:
curl -I http://your-mage2-store.dev/And You will see some similar Varnish keywords.
Voila, you’re done. Let your store fly!
Please do comment or contact us if you have any issues regarding Varnish + Magento2 Installation & Configuration.