Recently, the MagePsycho team developed Mass Importer Pro: Price Importer Extension, the fastest price import tool for Magento. It provides for importing/updating different prices, such as regular, special, tier, and group prices. This article will serve as documentation for the Mass Importer Pro: Price Importer Extension.
1. INSTALLATION
- Before installation, make sure that Cache(System > Cache Management) / Compilation(System > Tools > Compilation) is disabled.
- After the purchase of the extension, you can immediately download the extension from www.magepsycho.com > My Account > My Downloads.
- Unzipping it, you will get ‘app’ & ‘var’ folders and ReadMe.txt file
- Upload the ‘app’ & ‘var’ folder to the root of your Magento installation.
- Note that upload of ‘var’ folder is optional as it contains some sample CSV files only.
- Installation is done!
- After installation, you can enable the Cache / Compilation if required.
2. CONFIGURATION
After installation, login to the admin. If you get 404 error page in the extension page then try to log out and re-login.
You will now see the top level menu called ‘Mass Importer Pro’ in the admin:

Extension Activation
0. Go to ‘Mass Importer Pro’ > ‘Price Importer’ menu, you will see the following form (with disabled ‘Run Import’ button) which means you need to enable the extension and activate it with the provided license key.

1. Go to ‘Mass Importer Pro’ > ‘Manage Settings’ menu, you will see the following section for configuration:
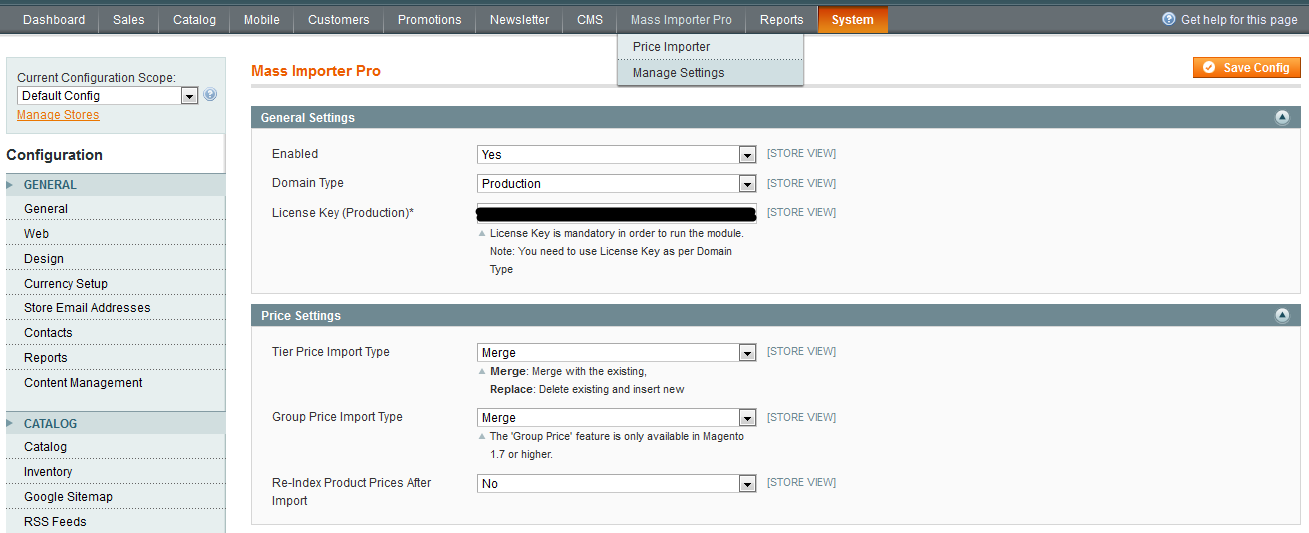
And configure as:
[General Settings]
- Enabled = Yes
- Domain Type = Production / Development
- License Key = [will be provided in the email shortly after the purchase of the extension]
[Price Settings]
- Tier Price Import Type = Merge / Replace (Group / All)
- Group Price Import Type = Merge / Replace (Group / All)
- Re-Index Product Price After Import = Yes / No
- [This setting will be used as the default for importing prices]
2. Go to ‘Mass Importer Pro’ > ‘Price Importer’ menu, You will see the activated ‘Run Import’ button which means you are ready to go with unlimited price imports.
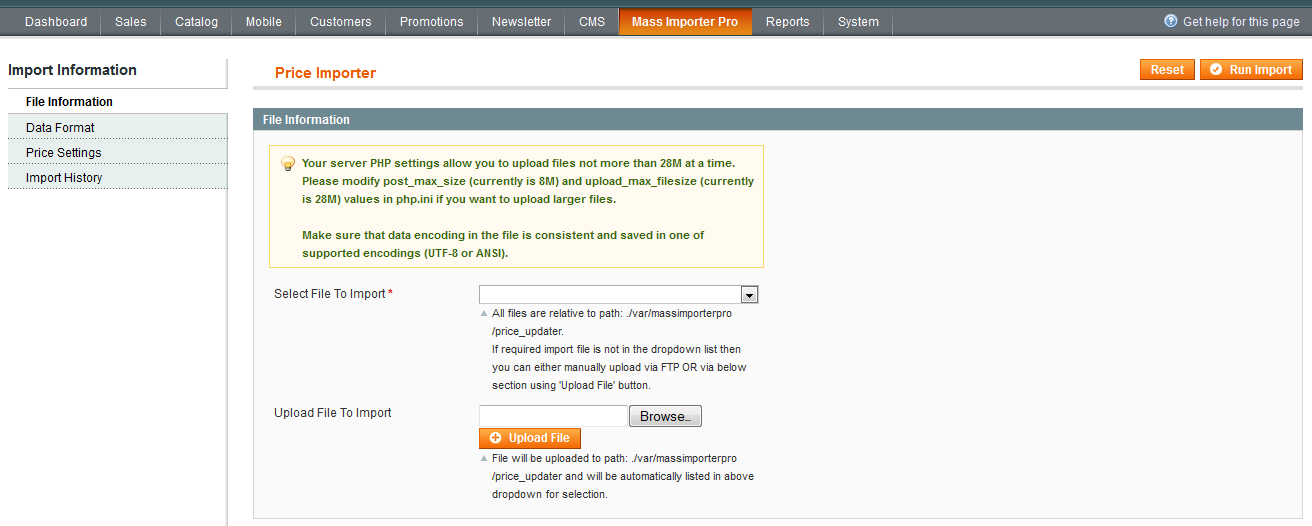
3. The configuration is done!
3. IMPORTING PRICES
After the extension gets installed and configured properly, you should be able to import prices using a CSV file. Before importing, you need to know the supported CSV fields and the valid data format required for the extension.
Preparing CSV Fields
You can refer to the [Sample CSV File] in order to find all the supported fields, which are:
“sku”,”website_id”,”cost”,”price”,”special_price”,”special_from_date”,”special_to_date”,”tier_price:_all_”
,”tier_price:Wholesale”,”tier_price:[Any-Customer-Group]”,”group_price:Wholesale”,”group_price:[Any-Customer-Group]”
| Field | Description |
|---|---|
| sku | SKU of the product |
| cost | Cost |
| price | Regular/Unit Price |
| special_price | Special Price, If ‘special_from_date’ & ‘special_to_date’ fields are left empty then the price is special for an unlimited time period |
| special_from_date | Special From Date, Date field should be in [YYYY-mm-dd] format. For example 2012-06-15 |
| special_to_date | Special To Date, Date field should be in [YYYY-mm-dd] format. For example 2012-08-25 |
| website_id | Website Id, Used for Website wise tier/group pricing import. |
| tier_price:_all_ | Tier price for all groups, Values for tier_price should be in tierQty:tierPrice format separated by a semi-colon(;). For example: 10:100;20:90;50:70 If you want to delete the tier price then you can mark it with value ‘x’. For example: 10:x;20:x;50:70 |
| tier_price:[CustomerGroupName] | If you want tier price for specific groups then you need to add a new column in the CSV with name = tier_price:[CustomerGroupName] For example tier_price: Wholesale if customer group is Wholesale, tier_price: Retailer if customer group is Retailer. You can find the customer group name from backend: Customers > Customer Groups. Values should be in the same format as an above field(tier_price:_all_). |
| group_price:[CustomerGroupName] | Group Price is a new feature available in Magento since 1.7.0.0 version. If you want customer group wise price then you need to add a new column in the CSV with name = group_price:[CustomerGroupName] For example group_price: Wholesale if customer group is Wholesale, group_price: Retailer if customer group is Retailer. The field value should contain the price only. |
Among the above fields, only SKU & website_id are the compulsory fields.
You can use the other fields depending on your requirement. You can either leave the column value empty or remove the column itself if you don’t want to update that field.
EDIT
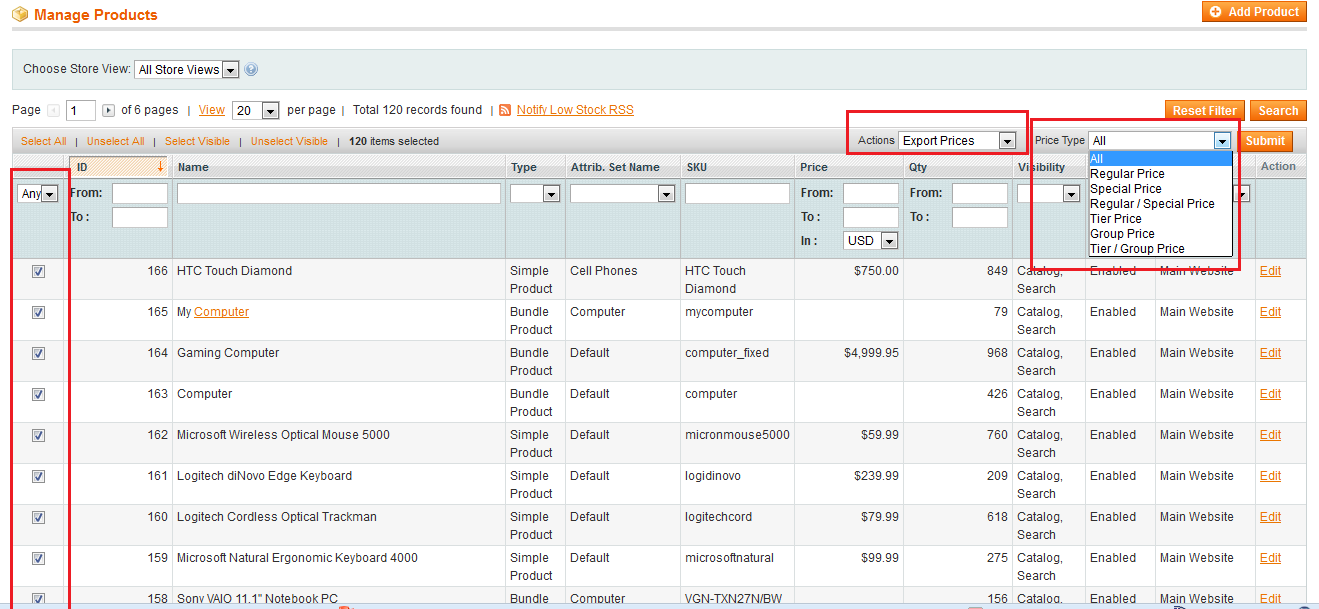
Mass Importer Pro: Price Importer (version > 1.1.0) now supports price export feature in CSV format which reduces the complexity of the manual process of CSV fields preparation. Now you can easily export the required price types of the selected products using this extension. Refer the following snapshot for more:
Note: Currently Price Importer supports only the CSV file type, using a comma (,) as delimiter and double quotes(“) as an enclosure. We recommend you to use OpenOffice tool for the formatting CSV file.
When CSV file is ready, go to ‘Mass Importer Pro’ > ‘Price Updater’ menu and go ahead for importing with the following three steps:
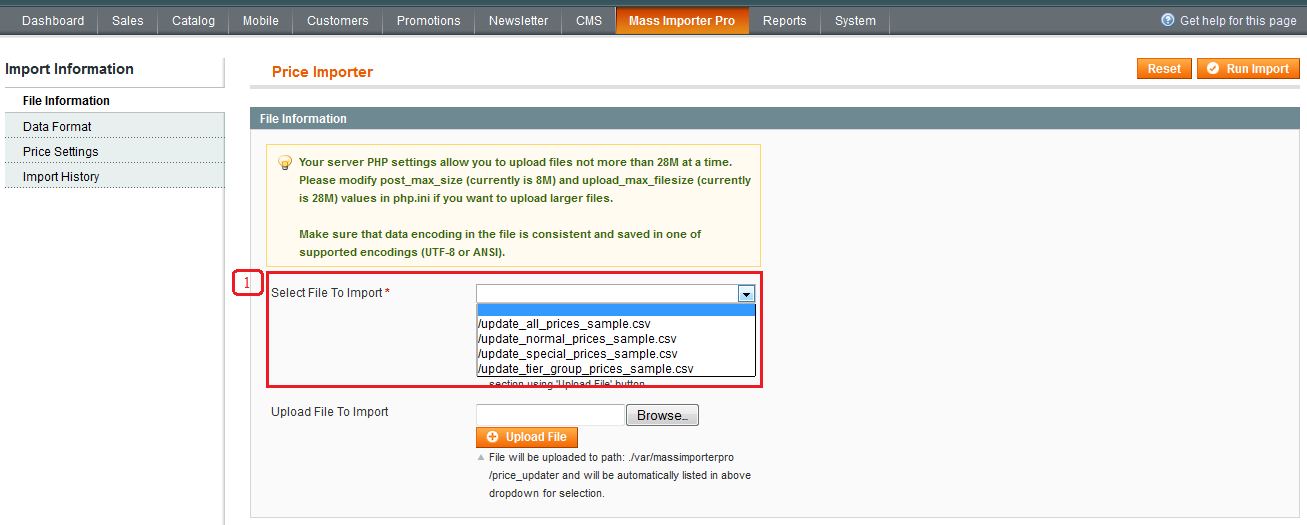
1. Selecting CSV File:
Select the required CSV file from ‘Select File To Import’ dropdown. If required CSV file is not in the dropdown list then you can either manually upload via FTP to path ./var/massimporterpro/price_updater/ OR via form using ‘Upload File’ button.
2. Configuring Settings:
You can configure the Price Settings from ‘Price Settings’ tab. If not configured the settings will be taken from System > Configuration.

3. Hit ‘Run Import’ button
After submitting the form, you will see the message mentioning how many rows were imported, how many rows were skipped, etc.
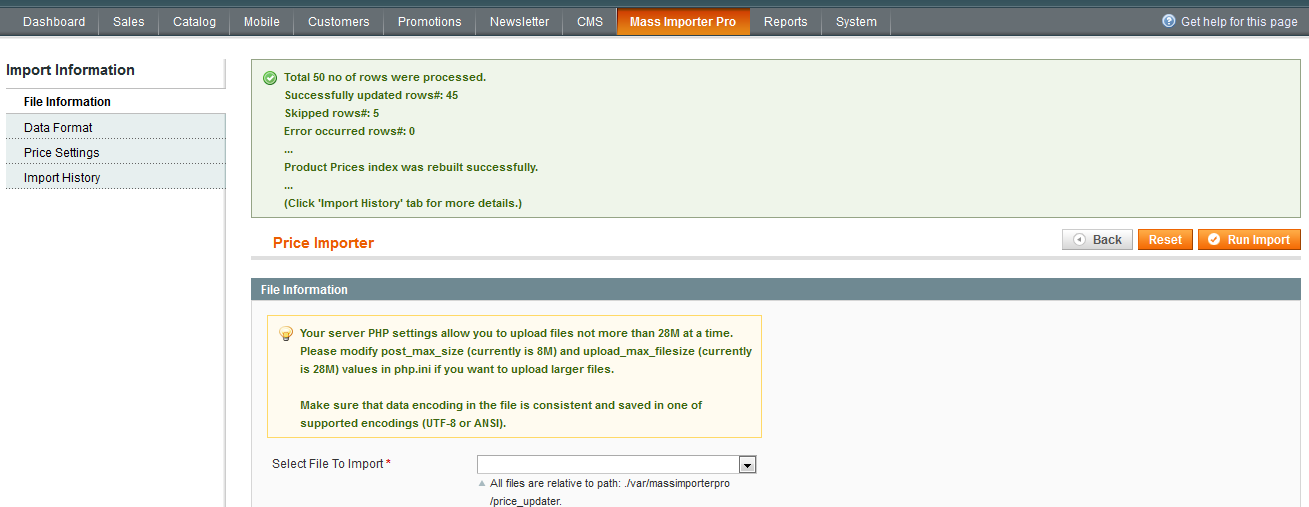
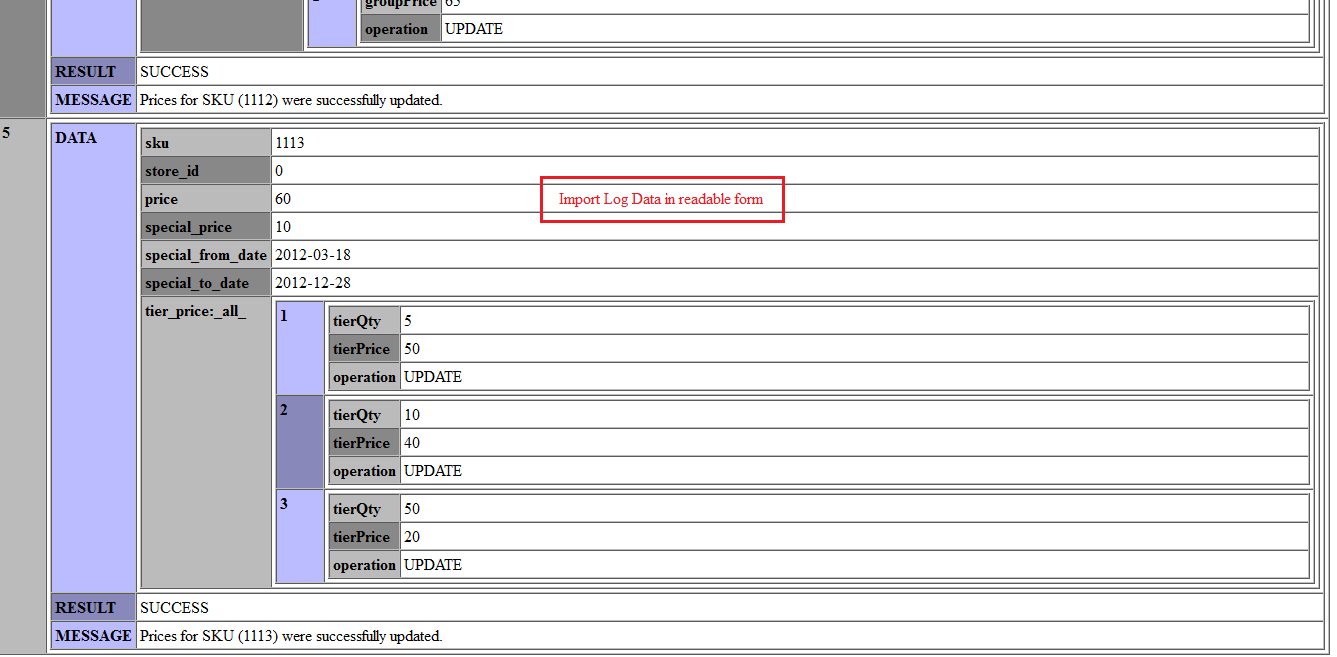
To view more information about the import you can go to ‘Import History’ tab and can view the log data after clicking on the ‘View Log’ link, which will give you the data used during import operation and the result of success, failure or skipped.

That’s all about installation, configuration & importing regarding Mass Importer Pro: Price Importer extension.
Once you have used the import operation you will find it to be one of the fastest of its type (as it imports/updates thousands of product prices within a few seconds). This is not just a claim on my part, the plugin has proven itself.
Happy Importing with Mass Importer Pro: Price Importer!